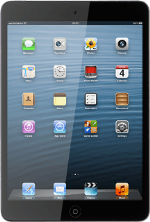
Apple iPad mini (iOS6)

Apple iPad mini

iOS 6

Start using your device - Apple iPad mini (iOS6)

Read help info

When you start using your device, there are some guidelines you need to follow. Follow these instructions to start using your device.

Step 1 of 43

Insert your SIM

Insert the opener for the SIM holder into the small hole in the SIM holder on the side of your device.

Step 2 of 43

Insert your SIM

Remove the SIM holder from your device.

Step 3 of 43

Insert your SIM

Turn your SIM so that the angled corner of your SIM matches the angled corner of the SIM holder.
Place your SIM in the SIM holder.

Step 4 of 43

Insert your SIM

Insert the SIM holder into your device.

Step 5 of 43

Turn on your device

Press and hold On/Off until your device is turned on.

Step 6 of 43

Turn on your device

Drag the arrow right.

Step 7 of 43

Turn on your device

Press Unlock.

Step 8 of 43

Turn on your device

Key in your PIN and press OK.

Step 9 of 43

Select general settings

To change language:
Press the required language.

Step 10 of 43

Select general settings

Press arrow right.

Step 11 of 43

Select general settings

To change country or area:
If required, press Show More....

Step 12 of 43

Select general settings

Press the required country or area.

Step 13 of 43

Select general settings

Press Next.

Step 14 of 43

Select connection type

To activate your device using Wi-Fi:
Press the required Wi-Fi network or Other....

Step 15 of 43

Select connection type

Follow the instructions on the display to connect to the required Wi-Fi network.
Press Next.

Step 16 of 43

Select connection type

To activate your device using the mobile network:
Press Use Cellular Connection.

Step 17 of 43

Turn location services on or off

Press Enable Location Services or Disable Location Services.

Step 18 of 43

Turn location services on or off

Press Next.

Step 19 of 43

Turn location services on or off

If you select Disable Location Services:

Step 20 of 43

Turn location services on or off

Press OK.

Step 21 of 43

Select option

If it's the first time you use an iPad:
Press Set Up as New iPad and go to step 6a.

Before you can select Restore from iCloud Backup or Restore from iTunes Backup, you need an iTunes or iCloud backup of the device memory from your previous iPad.
Step 22 of 43

Select option

If you've used an iPad before and want to restore previous content from an iCloud backup:
Press Restore from iCloud Backup and go to step 6b.

Before you can select Restore from iCloud Backup or Restore from iTunes Backup, you need an iTunes or iCloud backup of the device memory from your previous iPad.
Step 23 of 43

Select option

If you've used an iPad before and want to restore previous content from an iTunes backup:
Press Restore from iTunes Backup and go to step 6c.

Before you can select Restore from iCloud Backup or Restore from iTunes Backup, you need an iTunes or iCloud backup of the device memory from your previous iPad.
Step 24 of 43

6a - "Set Up as New iPad"

Press Next.

An Apple ID gives you access to several functions on your device, such as iCloud, App Store and iTunes. If you choose to activate your device without an Apple ID, you can log on or create an Apple ID at a later time.
Step 25 of 43

6a - "Set Up as New iPad"

To activate your device using an existing Apple ID:
Press Sign In with an Apple ID.

An Apple ID gives you access to several functions on your device, such as iCloud, App Store and iTunes. If you choose to activate your device without an Apple ID, you can log on or create an Apple ID at a later time.
Step 26 of 43

6a - "Set Up as New iPad"

To activate your device using a new Apple ID:
Press Create a Free Apple ID.

An Apple ID gives you access to several functions on your device, such as iCloud, App Store and iTunes. If you choose to activate your device without an Apple ID, you can log on or create an Apple ID at a later time.
Step 27 of 43

6a - "Set Up as New iPad"

To activate your device without an Apple ID:
Press Skip This Step.

An Apple ID gives you access to several functions on your device, such as iCloud, App Store and iTunes. If you choose to activate your device without an Apple ID, you can log on or create an Apple ID at a later time.
Step 28 of 43

6a - "Set Up as New iPad"

Press Skip.
Follow the instructions on the display to activate your device.

An Apple ID gives you access to several functions on your device, such as iCloud, App Store and iTunes. If you choose to activate your device without an Apple ID, you can log on or create an Apple ID at a later time.
Step 29 of 43

6b - "Restore from iCloud Backup"

Press Next.

Step 30 of 43

6b - "Restore from iCloud Backup"

Press Apple ID and key in the username for your Apple ID.

Step 31 of 43

6b - "Restore from iCloud Backup"

Press Password and key in the password for your Apple ID.

Step 32 of 43

6b - "Restore from iCloud Backup"

Press Next.

Step 33 of 43

6b - "Restore from iCloud Backup"

Press Agree.

Step 34 of 43

6b - "Restore from iCloud Backup"

Press Agree to confirm.

Step 35 of 43

6b - "Restore from iCloud Backup"

Press the required backup.

Step 36 of 43

6b - "Restore from iCloud Backup"

Press Restore.
Your device restores the contents of the selected backup.
Follow the instructions on the display to activate your device.

Step 37 of 43

6c - "Restore from iTunes Backup"

Press Next.
Go to www.itunes.com on your computer.
Find the download section on the web page to download iTunes.
Download and install iTunes on your computer.

Step 38 of 43

6c - "Restore from iTunes Backup"

Start the program iTunes on your computer.

Step 39 of 43

6c - "Restore from iTunes Backup"

Connect the data cable to the socket at the bottom of your device and to your computer's USB port.

Step 40 of 43

6c - "Restore from iTunes Backup"

Click Restore from this backup.

Step 41 of 43

6c - "Restore from iTunes Backup"

Click the drop down list next to Restore from this backup.

Step 42 of 43

6c - "Restore from iTunes Backup"

Click the required backup.

Step 43 of 43

6c - "Restore from iTunes Backup"

Click Continue.
Your device restores the contents of the selected backup.

Insert your SIM

Insert the opener for the SIM holder into the small hole in the SIM holder on the side of your device.
Remove the SIM holder from your device.
Turn your SIM so that the angled corner of your SIM matches the angled corner of the SIM holder.
Place your SIM in the SIM holder.
Insert the SIM holder into your device.

Turn on your device

Press and hold On/Off until your device is turned on.
Drag the arrow right.
Press Unlock.
Key in your PIN and press OK.

Select general settings

To change language:
Press the required language.
Press arrow right.
To change country or area:
If required, press Show More....
Press the required country or area.
Press Next.

Select connection type

To activate your device using Wi-Fi:
Press the required Wi-Fi network or Other....
Follow the instructions on the display to connect to the required Wi-Fi network.
Press Next.
To activate your device using the mobile network:
Press Use Cellular Connection.

Turn location services on or off

Press Enable Location Services or Disable Location Services.
Press Next.
If you select Disable Location Services:
Press OK.

Select option

If it's the first time you use an iPad:
Press Set Up as New iPad and go to step 6a.
Before you can select Restore from iCloud Backup or Restore from iTunes Backup, you need an iTunes or iCloud backup of the device memory from your previous iPad.
If you've used an iPad before and want to restore previous content from an iCloud backup:
Press Restore from iCloud Backup and go to step 6b.
Before you can select Restore from iCloud Backup or Restore from iTunes Backup, you need an iTunes or iCloud backup of the device memory from your previous iPad.
If you've used an iPad before and want to restore previous content from an iTunes backup:
Press Restore from iTunes Backup and go to step 6c.
Before you can select Restore from iCloud Backup or Restore from iTunes Backup, you need an iTunes or iCloud backup of the device memory from your previous iPad.

6a - "Set Up as New iPad"

Press Next.
An Apple ID gives you access to several functions on your device, such as iCloud, App Store and iTunes. If you choose to activate your device without an Apple ID, you can log on or create an Apple ID at a later time.
To activate your device using an existing Apple ID:
Press Sign In with an Apple ID.
An Apple ID gives you access to several functions on your device, such as iCloud, App Store and iTunes. If you choose to activate your device without an Apple ID, you can log on or create an Apple ID at a later time.
To activate your device using a new Apple ID:
Press Create a Free Apple ID.
An Apple ID gives you access to several functions on your device, such as iCloud, App Store and iTunes. If you choose to activate your device without an Apple ID, you can log on or create an Apple ID at a later time.
To activate your device without an Apple ID:
Press Skip This Step.
An Apple ID gives you access to several functions on your device, such as iCloud, App Store and iTunes. If you choose to activate your device without an Apple ID, you can log on or create an Apple ID at a later time.
Press Skip.
Follow the instructions on the display to activate your device.
An Apple ID gives you access to several functions on your device, such as iCloud, App Store and iTunes. If you choose to activate your device without an Apple ID, you can log on or create an Apple ID at a later time.

6b - "Restore from iCloud Backup"

Press Next.
Press Apple ID and key in the username for your Apple ID.
Press Password and key in the password for your Apple ID.
Press Next.
Press Agree.
Press Agree to confirm.
Press the required backup.
Press Restore.
Your device restores the contents of the selected backup.
Follow the instructions on the display to activate your device.

6c - "Restore from iTunes Backup"

Press Next.
Go to www.itunes.com on your computer.
Find the download section on the web page to download iTunes.
Download and install iTunes on your computer.
Start the program iTunes on your computer.
Connect the data cable to the socket at the bottom of your device and to your computer's USB port.
Click Restore from this backup.
Click the drop down list next to Restore from this backup.
Click the required backup.
Click Continue.
Your device restores the contents of the selected backup.

Get information on...

Or select...

Another device