Apple iPad Pro 12.9 (2020)

Apple iPad Pro 12.9 (2020)

Select Screen Time settings on your Apple iPad Pro 12.9 (2020) iPadOS 13.4

Read help info

Using Screen Time you can get an overview of how much you use your tablet and set time limits on the use of selected apps.

Press Settings.
Step 1 of 40

1. Find "Screen Time"

Press Settings.
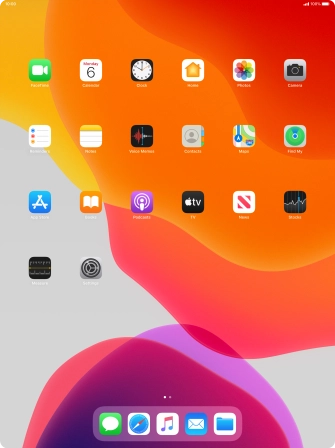
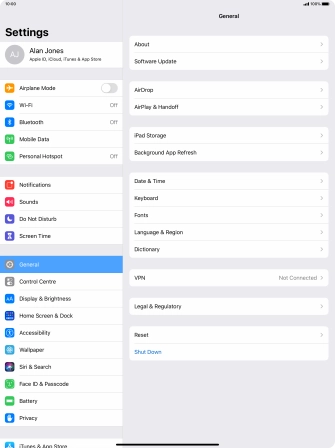
Press Screen Time.
Step 2 of 40

1. Find "Screen Time"

Press Screen Time.

Press Turn On Screen Time.
Step 3 of 40

2. Turn on Screen Time

Press Turn On Screen Time.

Press Continue.
Step 4 of 40

2. Turn on Screen Time

Press Continue.

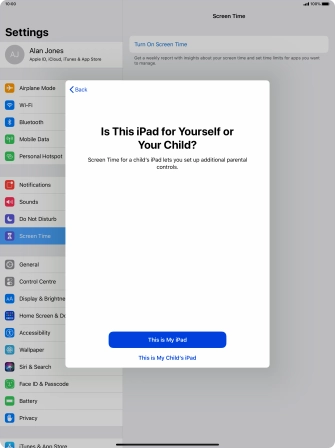
Press This is My iPad.
Step 5 of 40

2. Turn on Screen Time

Press This is My iPad.

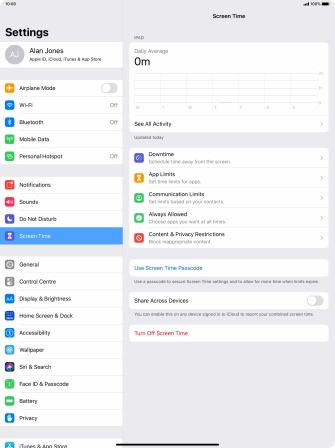
Press Downtime.
Step 6 of 40

3. Select Downtime settings

Press Downtime.

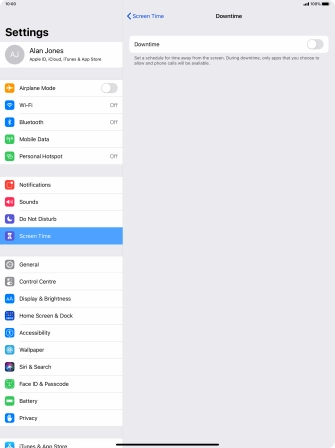
Press the indicator next to
Step 7 of 40

3. Select Downtime settings

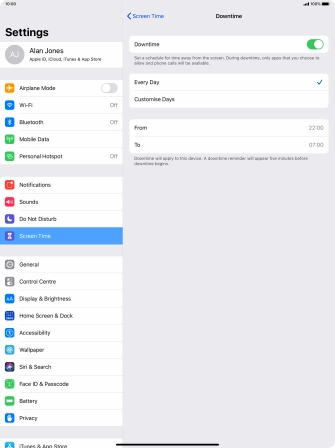
Press the indicator next to "Downtime" and follow the instructions on the screen to select Downtime period.

During Downtime only calls and allowed apps will be available.
Press arrow left.
Step 8 of 40

3. Select Downtime settings

Press arrow left.

Press App Limits.
Step 9 of 40

4. Select time limits for app usage

Press App Limits.

Press Add Limit.
Step 10 of 40

4. Select time limits for app usage

Press Add Limit.

Press the required categories.
Step 11 of 40

4. Select time limits for app usage

Press the required categories.

Press Next.
Step 12 of 40

4. Select time limits for app usage

Press Next.

Set the required time limit for use of the selected category.
Step 13 of 40

4. Select time limits for app usage

Set the required time limit for use of the selected category.

Press Customise Days.
Step 14 of 40

5. Select days for time limits of app usage

Press Customise Days.

Press the required days.
Step 15 of 40

5. Select days for time limits of app usage

Press the required days.

Select the required period.
Step 16 of 40

5. Select days for time limits of app usage

Select the required period.

Press arrow left.
Step 17 of 40

5. Select days for time limits of app usage

Press arrow left.

Press the required category.
Step 18 of 40

6. Delete time limits for app usage

Press the required category.

Press Delete Limit.
Step 19 of 40

6. Delete time limits for app usage

Press Delete Limit.

Press Delete.
Step 20 of 40

6. Delete time limits for app usage

Press Delete.

Press arrow left.
Step 21 of 40

6. Delete time limits for app usage

Press arrow left.

Press Communication Limits.
Step 22 of 40

7. Select communication limits during Screen Time

Press Communication Limits.

Press During Screen Time.
Step 23 of 40

7. Select communication limits during Screen Time

Press During Screen Time.

Press the required setting.
Step 24 of 40

7. Select communication limits during Screen Time

Press the required setting.

During Screen Time, only communication with allowed contacts is available.
Press arrow left.
Step 25 of 40

7. Select communication limits during Screen Time

Press arrow left.

Press During Downtime.
Step 26 of 40

8. Select communication limits during Downtime

Press During Downtime.

Press the required setting.
Step 27 of 40

8. Select communication limits during Downtime

Press the required setting.

During Downtime, only communication with allowed contacts is available.
If you select Specific Contacts, follow the instructions on the screen to select the required contacts.
Step 28 of 40

8. Select communication limits during Downtime

If you select Specific Contacts, follow the instructions on the screen to select the required contacts.

Press arrow left.
Step 29 of 40

8. Select communication limits during Downtime

Press arrow left.

Press arrow left.
Step 30 of 40

8. Select communication limits during Downtime

Press arrow left.

Press Always Allowed.
Step 31 of 40

9. Select apps that can be used during Downtime

Press Always Allowed.

Press the add icon next to the required app to add it to the list of allowed apps during Downtime.
Step 32 of 40

9. Select apps that can be used during Downtime

Press the add icon next to the required app to add it to the list of allowed apps during Downtime.

Press the remove icon next to the required app to remove it from the list of allowed apps during Downtime.
Step 33 of 40

9. Select apps that can be used during Downtime

Press the remove icon next to the required app to remove it from the list of allowed apps during Downtime.

Press Remove.
Step 34 of 40

9. Select apps that can be used during Downtime

Press Remove.

Press arrow left.
Step 35 of 40

9. Select apps that can be used during Downtime

Press arrow left.

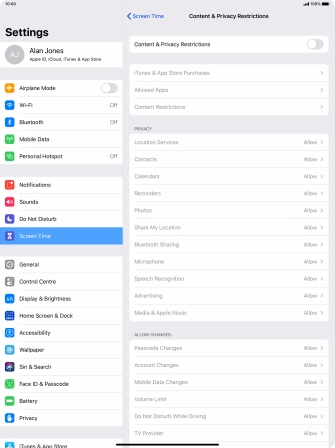
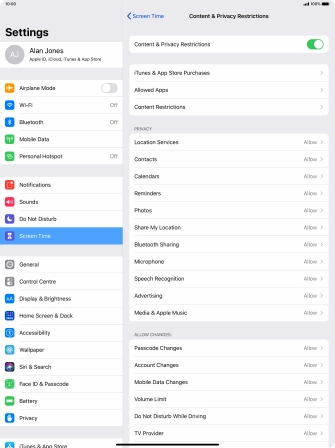
Press Content & Privacy Restrictions.
Step 36 of 40

10. Select settings for content and restrictions

Press Content & Privacy Restrictions.

Press the indicator next to
Step 37 of 40

10. Select settings for content and restrictions

Press the indicator next to "Content & Privacy Restrictions" and follow the instructions on the screen to select settings for content and privacy restrictions.

Press arrow left.
Step 38 of 40

10. Select settings for content and restrictions

Press arrow left.

Press Use Screen Time Passcode and follow the instructions on the screen to select a Screen Time password.
Step 39 of 40

11. Turn on use of password

Press Use Screen Time Passcode and follow the instructions on the screen to select a Screen Time password.

If you turn on the function, you need to key in the password to access Screen Time settings.
Slide your finger upwards starting from the bottom of the screen to return to the home screen.
Step 40 of 40

12. Return to the home screen

Slide your finger upwards starting from the bottom of the screen to return to the home screen.

1. Find "Screen Time"

Press Settings.
Press Screen Time.

2. Turn on Screen Time

Press Turn On Screen Time.
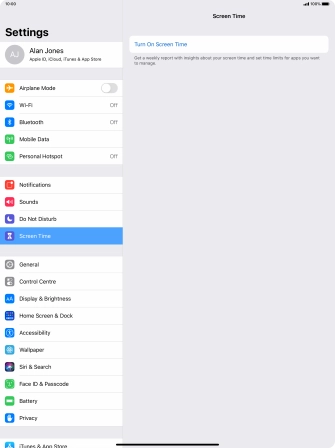
Press Continue.
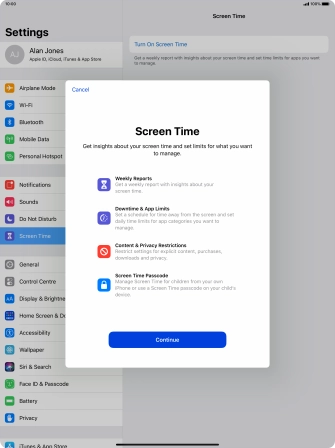
Press This is My iPad.
3. Select Downtime settings

Press Downtime.
Press the indicator next to "Downtime" and follow the instructions on the screen to select Downtime period.
During Downtime only calls and allowed apps will be available.
Press arrow left.
4. Select time limits for app usage

Press App Limits.
Press Add Limit.
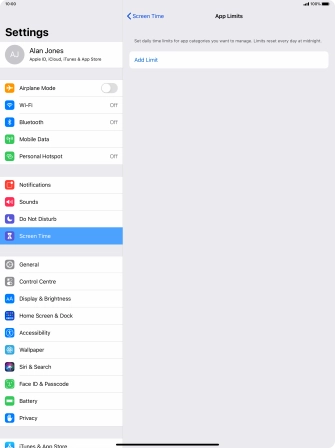
Press the required categories.
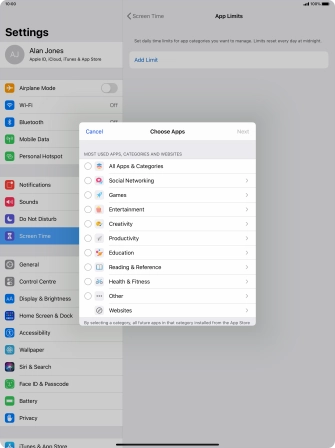
Press Next.
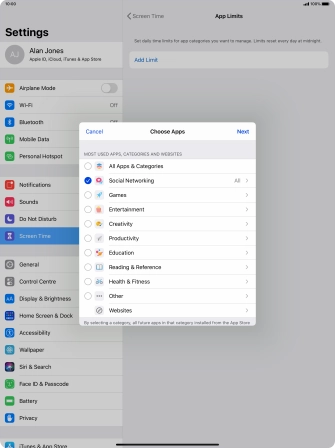
Set the required time limit for use of the selected category.
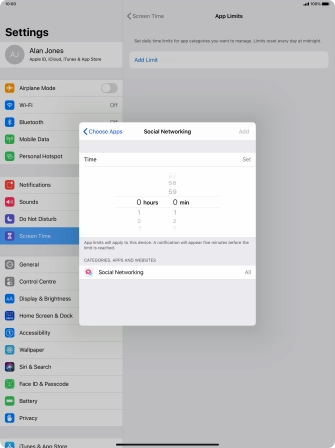
5. Select days for time limits of app usage

Press Customise Days.
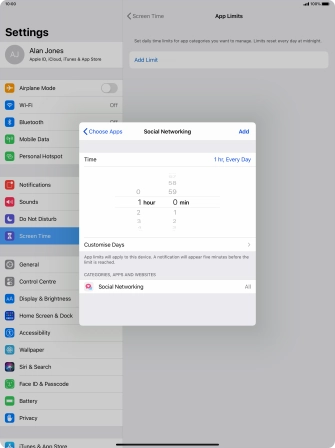
Press the required days.
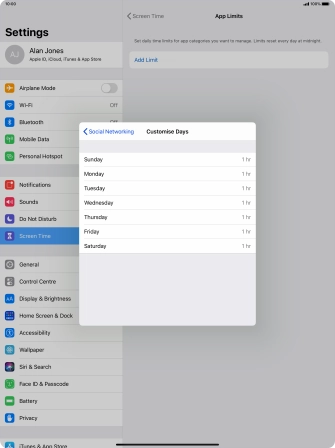
Select the required period.
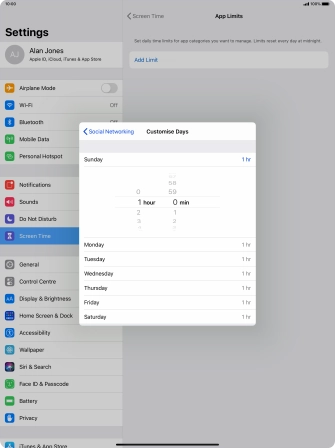
Press arrow left.

6. Delete time limits for app usage

Press the required category.
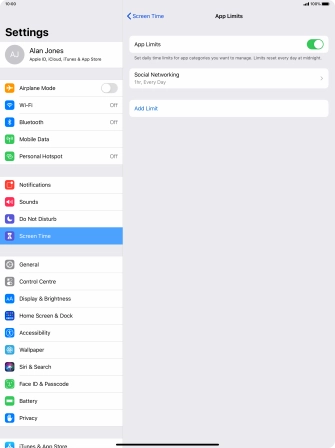
Press Delete Limit.
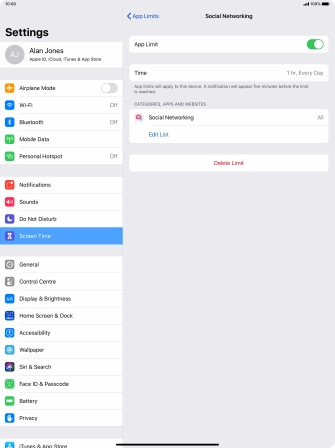
Press Delete.
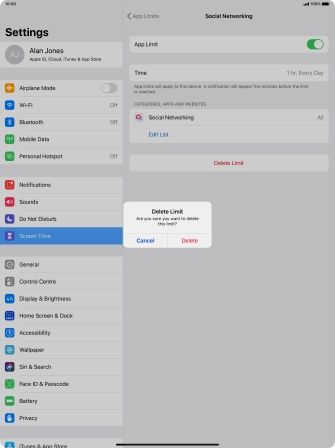
Press arrow left.

7. Select communication limits during Screen Time

Press Communication Limits.
Press During Screen Time.
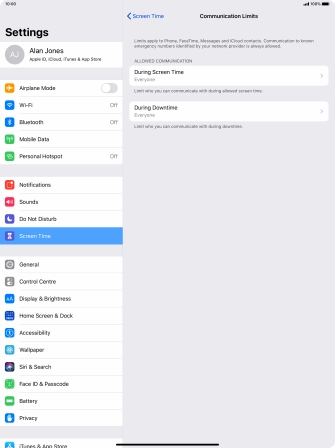
Press the required setting.
During Screen Time, only communication with allowed contacts is available.
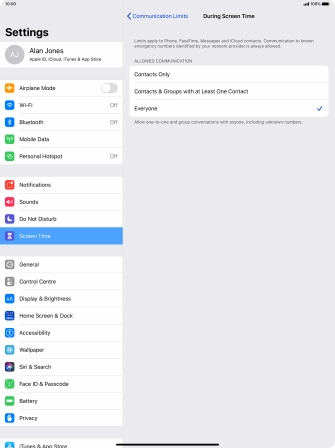
Press arrow left.

8. Select communication limits during Downtime

Press During Downtime.
Press the required setting.
During Downtime, only communication with allowed contacts is available.
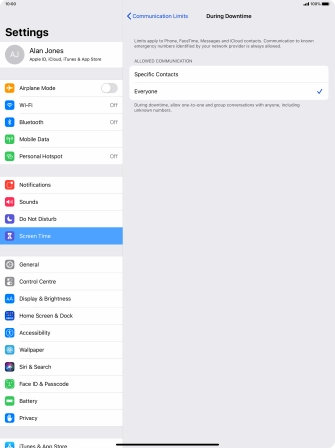
If you select Specific Contacts, follow the instructions on the screen to select the required contacts.
Press arrow left.
Press arrow left.

9. Select apps that can be used during Downtime

Press Always Allowed.
Press the add icon next to the required app to add it to the list of allowed apps during Downtime.
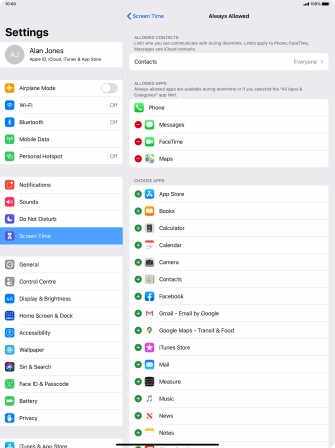
Press the remove icon next to the required app to remove it from the list of allowed apps during Downtime.
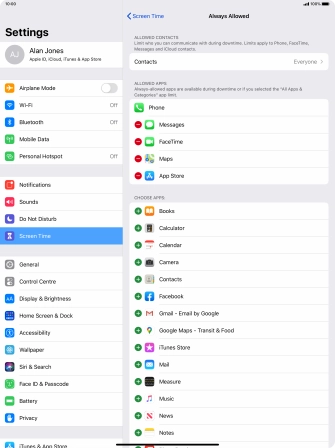
Press Remove.
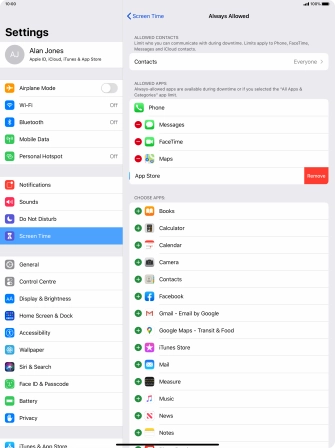
Press arrow left.

10. Select settings for content and restrictions

Press Content & Privacy Restrictions.
Press the indicator next to "Content & Privacy Restrictions" and follow the instructions on the screen to select settings for content and privacy restrictions.
Press arrow left.
11. Turn on use of password

Press Use Screen Time Passcode and follow the instructions on the screen to select a Screen Time password.
If you turn on the function, you need to key in the password to access Screen Time settings.

12. Return to the home screen

Slide your finger upwards starting from the bottom of the screen to return to the home screen.

Get information on...

Or select...

Another device