Sony Xperia miro

Sony Xperia miro

Personalise your phone display - Sony Xperia miro

Read help info

You can change many display settings, such as the background image to personalise your display. Follow these instructions to personalise your phone display.

Sony Xperia miro
Step 1 of 23

Select option

Select one of the following options:
Select background image, go to 1a.
Select theme, go to 1b.
Organise display shortcuts, go to 1c.
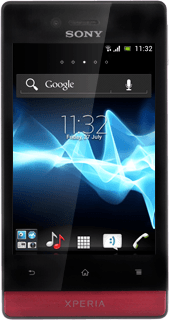
Step 2 of 23

1a - Select background image

Press the Menu key.

Step 3 of 23

1a - Select background image

Press Wallpaper.

Step 4 of 23

1a - Select background image

Press Album, Live Wallpapers or Xperia™ wallpapers.

Step 5 of 23

1a - Select background image

If you select Album:

Step 6 of 23

1a - Select background image

Press the required picture.

Step 7 of 23

1a - Select background image

Drag the frame to the required position to select the required detail.

Step 8 of 23

1a - Select background image

Press CROP.

Step 9 of 23

1a - Select background image

If you select Live Wallpapers:

Step 10 of 23

1a - Select background image

Press the required picture.

Step 11 of 23

1a - Select background image

Press Set wallpaper.

Step 12 of 23

1a - Select background image

If you select Xperia™ wallpapers:

Step 13 of 23

1a - Select background image

Press the required picture.

Step 14 of 23

1a - Select background image

Press Set wallpaper.

Step 15 of 23

1b - Select theme

Press the Menu key.

Step 16 of 23

1b - Select theme

Press Theme.

Step 17 of 23

1b - Select theme

Press the required theme.

Step 18 of 23

1c - Organise display shortcuts

To add a display shortcut:
Press the Menu key.

Step 19 of 23

1c - Organise display shortcuts

Press Add.

Step 20 of 23

1c - Organise display shortcuts

Press Widgets, Applications or Shortcuts.
Follow the instructions on the display to add the selected shortcut.

Step 21 of 23

1c - Organise display shortcuts

To move a display shortcut:
Press and hold the required shortcut.
Drag the shortcut to the required position.

Step 22 of 23

1c - Organise display shortcuts

To remove a display shortcut:
Press and hold the required shortcut.

Step 23 of 23

1c - Organise display shortcuts

Drag the shortcut to the delete icon.

Select option

Select one of the following options:
Select background image, go to 1a.
Select theme, go to 1b.
Organise display shortcuts, go to 1c.
Sony Xperia miro

1a - Select background image

Press the Menu key.
Press Wallpaper.
Press Album, Live Wallpapers or Xperia™ wallpapers.
If you select Album:
Press the required picture.
Drag the frame to the required position to select the required detail.
Press CROP.
If you select Live Wallpapers:
Press the required picture.
Press Set wallpaper.
If you select Xperia™ wallpapers:
Press the required picture.
Press Set wallpaper.

1b - Select theme

Press the Menu key.
Press Theme.
Press the required theme.

1c - Organise display shortcuts

To add a display shortcut:
Press the Menu key.
Press Add.
Press Widgets, Applications or Shortcuts.
Follow the instructions on the display to add the selected shortcut.
To move a display shortcut:
Press and hold the required shortcut.
Drag the shortcut to the required position.
To remove a display shortcut:
Press and hold the required shortcut.
Drag the shortcut to the delete icon.

Get information on...

Or select...

Another device