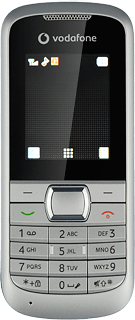
Vodafone 353

Vodafone 353

Create contact - Vodafone 353

Read help info

Follow these instructions to create a new contact.

Step 1 of 27

Find "Add new contact"

Press the Navigation key.

Step 2 of 27

Find "Add new contact"

Scroll to Contacts and press the Navigation key.

Step 3 of 27

Find "Add new contact"

Scroll to Add new contact and press the Navigation key.

Step 4 of 27

Select phone book

Highlight To SIM or To Phone and press the Navigation key.

If you select To SIM, the contact is created on your SIM.
If you select To Phone, the contact is created on your phone's phone book.
Step 5 of 27

Select phone book

The steps below are based on the To Phone phone book. If you select another phone book, there may be some differences in relation to the instructions.

If you select To SIM, the contact is created on your SIM.
If you select To Phone, the contact is created on your phone's phone book.
Step 6 of 27

Enter name

Highlight the field below Name and key in the required name.

Step 7 of 27

Enter name

Press the Navigation key.

Step 8 of 27

Enter phone number

Highlight the field below Number and key in the required phone number.

Always begin phone numbers with a + followed by the country code, even for local phone numbers. This ensures that the phone numbers can be called even when you're abroad.
Step 9 of 27

Enter phone number

Press the Navigation key.

Always begin phone numbers with a + followed by the country code, even for local phone numbers. This ensures that the phone numbers can be called even when you're abroad.
Step 10 of 27

Enter email address

Press Navigation key right to highlight the third tab.

Step 11 of 27

Enter email address

Highlight the field below Email address and key in the required email address.

Step 12 of 27

Enter email address

Press the Navigation key.

Vodafone 353
Step 13 of 27

Add more information

You can add more information to the contact. The following steps show two examples.
Select one of the following options:
Assign picture, go to 6a.
Assign ring tone, go to 6b.
Step 14 of 27

6a - Assign picture

Press Navigation key right to highlight the second tab.

Step 15 of 27

6a - Assign picture

Highlight the field below Caller picture and press the Navigation key.

Step 16 of 27

6a - Assign picture

Highlight the required picture, From camera or From file and press the Navigation key.

Step 17 of 27

6a - Assign picture

If you selected From camera:

Step 18 of 27

6a - Assign picture

Point the camera lens at the required object and press the Navigation key to take the picture.

Step 19 of 27

6a - Assign picture

If you selected From file:
Go to the required folder.

Step 20 of 27

6a - Assign picture

Highlight the required picture and press the Navigation key.

Step 21 of 27

6a - Assign picture

Press the Navigation key to assign the picture.

Step 22 of 27

6b - Assign ring tone

Press Navigation key right to highlight the second tab.

Step 23 of 27

6b - Assign ring tone

Highlight the field below Caller ringtone and press the Navigation key.
Go to the required folder.

Step 24 of 27

6b - Assign ring tone

Highlight the different ring tones to listen to them.

Step 25 of 27

6b - Assign ring tone

Once you've found a ring tone you like, press the Navigation key.

Step 26 of 27

Save and exit

Press Done.

Step 27 of 27

Save and exit

Press Disconnect to return to standby mode.

Find "Add new contact"

Press the Navigation key.
Scroll to Contacts and press the Navigation key.
Scroll to Add new contact and press the Navigation key.

Select phone book

Highlight To SIM or To Phone and press the Navigation key.
If you select To SIM, the contact is created on your SIM.
If you select To Phone, the contact is created on your phone's phone book.
The steps below are based on the To Phone phone book. If you select another phone book, there may be some differences in relation to the instructions.
If you select To SIM, the contact is created on your SIM.
If you select To Phone, the contact is created on your phone's phone book.

Enter name

Highlight the field below Name and key in the required name.
Press the Navigation key.

Enter phone number

Highlight the field below Number and key in the required phone number.
Always begin phone numbers with a + followed by the country code, even for local phone numbers. This ensures that the phone numbers can be called even when you're abroad.
Press the Navigation key.
Always begin phone numbers with a + followed by the country code, even for local phone numbers. This ensures that the phone numbers can be called even when you're abroad.

Enter email address

Press Navigation key right to highlight the third tab.
Highlight the field below Email address and key in the required email address.
Press the Navigation key.

Add more information

You can add more information to the contact. The following steps show two examples.
Select one of the following options:
Assign picture, go to 6a.
Assign ring tone, go to 6b.
Vodafone 353

6a - Assign picture

Press Navigation key right to highlight the second tab.
Highlight the field below Caller picture and press the Navigation key.
Highlight the required picture, From camera or From file and press the Navigation key.
If you selected From camera:
Point the camera lens at the required object and press the Navigation key to take the picture.
If you selected From file:
Go to the required folder.
Highlight the required picture and press the Navigation key.
Press the Navigation key to assign the picture.

6b - Assign ring tone

Press Navigation key right to highlight the second tab.
Highlight the field below Caller ringtone and press the Navigation key.
Go to the required folder.
Highlight the different ring tones to listen to them.
Once you've found a ring tone you like, press the Navigation key.

Save and exit

Press Done.
Press Disconnect to return to standby mode.

Get information on...

Or select...

Another device