Apple iPad (4th generation) (iOS6)

Apple iPad (4th generation)

iOS 6

Use calendar - Apple iPad (4th generation) (iOS6)

Read help info

Follow these instructions to use the calendar.

Step 1 of 25

Find "Calendar"

Press Calendar.

Apple iPad (4th generation) (iOS6)
Step 2 of 25

Use calendar

Follow the steps below to use the calendar.

Step 3 of 25

Select calendar view

Press one of the following options at the top of the display:
Day

Step 4 of 25

Select calendar view

Week

Step 5 of 25

Select calendar view

Month

Step 6 of 25

Select calendar view

Year

Step 7 of 25

Select calendar view

List

Step 8 of 25

Add appointment

Go to the required date.
Press the add appointment icon.

Step 9 of 25

Add appointment

Key in a subject for the appointment.
Follow the instructions on the display to key in more information, such as location, duration and reminder.
Press Done.

Step 10 of 25

View appointment

Press List.

Step 11 of 25

View appointment

Press the required appointment to view the appointment details.

Step 12 of 25

Create new calendar

Press Calendars.

Step 13 of 25

Create new calendar

Press Edit.

Step 14 of 25

Create new calendar

Press Add Calendar....
Key in a name for the calendar.

Step 15 of 25

Create new calendar

To select the colour for appointments in the calendar:
Press the required colour.

Step 16 of 25

Create new calendar

Press Done repeatedly to return to the calendar.

Step 17 of 25

Share calendar

Go to www.icloud.com on your computer.
Log on to iCloud if you're asked to do so.
Select Calendar.

Before you can share your calendar with others, you need an Apple ID. If you don't have an Apple ID, you can create one at www.apple.com
Step 18 of 25

Share calendar

Select the edit icon next to the required calendar.

Before you can share your calendar with others, you need an Apple ID. If you don't have an Apple ID, you can create one at www.apple.com
Step 19 of 25

Share calendar

Select Private Calendar or Public Calendar.

Before you can share your calendar with others, you need an Apple ID. If you don't have an Apple ID, you can create one at www.apple.com
Step 20 of 25

Share calendar

If you select Private Calendar:

Before you can share your calendar with others, you need an Apple ID. If you don't have an Apple ID, you can create one at www.apple.com
Step 21 of 25

Share calendar

Select Add Person....

Before you can share your calendar with others, you need an Apple ID. If you don't have an Apple ID, you can create one at www.apple.com
Step 22 of 25

Share calendar

Key in the required email address and select OK.

Before you can share your calendar with others, you need an Apple ID. If you don't have an Apple ID, you can create one at www.apple.com
Step 23 of 25

Share calendar

If you select Public Calendar:

Before you can share your calendar with others, you need an Apple ID. If you don't have an Apple ID, you can create one at www.apple.com
Step 24 of 25

Share calendar

Select OK.

Before you can share your calendar with others, you need an Apple ID. If you don't have an Apple ID, you can create one at www.apple.com
Step 25 of 25

Exit

Press the Home key to return to standby mode.

Find "Calendar"

Press Calendar.

Use calendar

Follow the steps below to use the calendar.
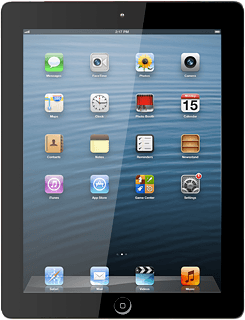
Apple iPad (4th generation) (iOS6)

Select calendar view

Press one of the following options at the top of the display:
Day
Week
Month
Year
List

Add appointment

Go to the required date.
Press the add appointment icon.
Key in a subject for the appointment.
Follow the instructions on the display to key in more information, such as location, duration and reminder.
Press Done.

View appointment

Press List.
Press the required appointment to view the appointment details.

Create new calendar

Press Calendars.
Press Edit.
Press Add Calendar....
Key in a name for the calendar.
To select the colour for appointments in the calendar:
Press the required colour.
Press Done repeatedly to return to the calendar.

Share calendar

Go to www.icloud.com on your computer.
Log on to iCloud if you're asked to do so.
Select Calendar.
Before you can share your calendar with others, you need an Apple ID. If you don't have an Apple ID, you can create one at www.apple.com
Select the edit icon next to the required calendar.
Before you can share your calendar with others, you need an Apple ID. If you don't have an Apple ID, you can create one at www.apple.com
Select Private Calendar or Public Calendar.
Before you can share your calendar with others, you need an Apple ID. If you don't have an Apple ID, you can create one at www.apple.com
If you select Private Calendar:
Before you can share your calendar with others, you need an Apple ID. If you don't have an Apple ID, you can create one at www.apple.com
Select Add Person....
Before you can share your calendar with others, you need an Apple ID. If you don't have an Apple ID, you can create one at www.apple.com
Key in the required email address and select OK.
Before you can share your calendar with others, you need an Apple ID. If you don't have an Apple ID, you can create one at www.apple.com
If you select Public Calendar:
Before you can share your calendar with others, you need an Apple ID. If you don't have an Apple ID, you can create one at www.apple.com
Select OK.
Before you can share your calendar with others, you need an Apple ID. If you don't have an Apple ID, you can create one at www.apple.com

Exit

Press the Home key to return to standby mode.

Get information on...

Or select...

Another device