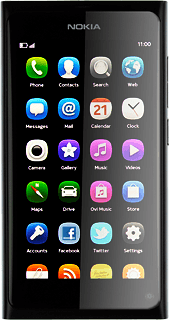
Find "Messages"
Press Settings.
Press Applications.
Press Messages.
Create new data connection
Press Multimedia message centre.
Press User defined.
Enter APN
Press the field below Access point and key in live.vodafone.com
Enter picture messaging server
Press the field below Multimedia message centre and key in http://pxt.vodafone.net.au/pxtsend
Enter IP address
Press the field below Proxy and key in 10.202.002.060
Enter port
Press the field below Proxy port and key in 8080
Save and activate data connection
Press Done to save and activate the data connection.
Select settings for receiving picture messages
Press Downloading of messages.
If you select Automatic, you'll receive all picture messages.
If you select Automatic in home network only, you'll be notified before you receive picture messages when roaming.
If you select Manual, you'll always be notified before you receive picture messages.
If you select Automatic in home network only, you'll be notified before you receive picture messages when roaming.
If you select Manual, you'll always be notified before you receive picture messages.
Press Automatic.
If you select Automatic, you'll receive all picture messages.
If you select Automatic in home network only, you'll be notified before you receive picture messages when roaming.
If you select Manual, you'll always be notified before you receive picture messages.
If you select Automatic in home network only, you'll be notified before you receive picture messages when roaming.
If you select Manual, you'll always be notified before you receive picture messages.
Turn request for delivery reports on or off
Press the indicator next to Delivery report.
Depending on the current setting, request for delivery reports is turned on or off.
Depending on the current setting, request for delivery reports is turned on or off.
Exit
Slide your finger across the display to return to standby mode.

How would you rate your experience?
Thank you for your evaluation!


