Huawei Y5 2018

Huawei Y5 2018

Android 8.1

Set up your Huawei Y5 2018 Android 8.1 for POP3 email

Read help info

You can set up your phone to send and receive email messages from your email accounts. Using POP3, your email messages are retrieved to your phone and at the same time they are deleted from the server. You're then not able to access your email messages from other devices. To set up your phone for POP3 email, you need to set up your phone for internet.

Step 1 of 39

1. Find "Users & accounts"

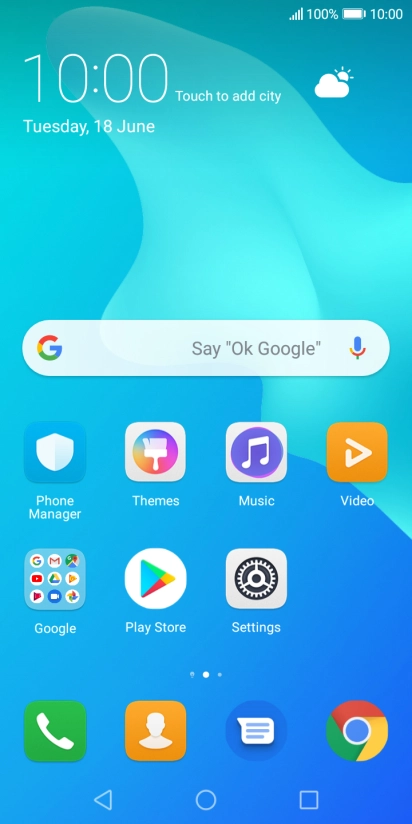
Press Settings.

Step 2 of 39

1. Find "Users & accounts"

Press Users & accounts.

Step 3 of 39

2. Create new email account

Press Add account.

Step 4 of 39

2. Create new email account

Press Email.

Step 5 of 39

3. Enter email address

Press Email address and key in your email address.

Step 6 of 39

4. Enter password

Press Password and key in the password for your email account.

Step 7 of 39

4. Enter password

Press SIGN IN.

Step 8 of 39

4. Enter password

If this screen is displayed, you email account has been recognised and set up automatically. Follow the instructions on the screen to key in more information and finish setting up your phone.

Step 9 of 39

5. Select server type

Press POP3.

Step 10 of 39

6. Enter username

Press the field below "Username" and key in the username for your email account.

Step 11 of 39

7. Enter incoming server

Press the field below "Server" and key in the name of your email provider's incoming server.

110
Step 12 of 39

8. Enter incoming port

Press the field below "Port" and key in 110.

Step 13 of 39

9. Turn off encryption of incoming email messages

Press Security type.

Step 14 of 39

9. Turn off encryption of incoming email messages

Press None to turn off the function.

Step 15 of 39

10. Turn deletion of email messages on server on or off

Press Delete email from server.

Step 16 of 39

10. Turn deletion of email messages on server on or off

Press Never to keep email messages on the server when you delete them on your phone.

Step 17 of 39

10. Turn deletion of email messages on server on or off

Press When I delete from Inbox to delete email messages on the server when you delete them on your phone.

Step 18 of 39

10. Turn deletion of email messages on server on or off

Press NEXT.

smtp.vodafone.net.au
Step 19 of 39

11. Enter outgoing server

Press the field below "SMTP server" and key in the name or IP address of your email provider's outgoing server. Please note that if you can't send email messages when using your email provider's outgoing server, key in smtp.vodafone.net.au (Vodafone's outgoing server).

25
Step 20 of 39

12. Enter outgoing port

Press the field below "Port" and key in 25.

Step 21 of 39

13. Turn off encryption of outgoing email messages

Press Security type.

Step 22 of 39

13. Turn off encryption of outgoing email messages

Press None to turn off the function.

Step 23 of 39

14. Turn SMTP authentication on or off

Press the field next to "Require sign-in" to turn the function on or off. Please note that if you're using Vodafone's outgoing server, turn off SMTP authentication and leave the username and password fields empty.

Step 24 of 39

14. Turn SMTP authentication on or off

Press the field below "Username" and key in the username for your email account.

Step 25 of 39

14. Turn SMTP authentication on or off

Press the field below "Password" and key in the password for your email account.

Step 26 of 39

14. Turn SMTP authentication on or off

Press NEXT.

Step 27 of 39

15. Select setting for retrieval of new email messages

Press Sync frequency.

Step 28 of 39

15. Select setting for retrieval of new email messages

Press the required setting.

Step 29 of 39

16. Turn email message notifications on or off

Press Notify me when email arrives. to turn the function on or off.

Step 30 of 39

17. Turn on email message synchronisation

Press Sync email from this account. to turn on the function.

Step 31 of 39

17. Turn on email message synchronisation

Press NEXT.

Step 32 of 39

18. Find "Account settings"

Press the required email account.

Step 33 of 39

18. Find "Account settings"

Press Account settings.

Step 34 of 39

19. Enter email account name

Press the required email account.

Step 35 of 39

19. Enter email account name

Press Account name and key in the required name.

Step 36 of 39

19. Enter email account name

Press OK.

Step 37 of 39

20. Enter sender name

Press Your name and key in the required sender name.

Step 38 of 39

20. Enter sender name

Press OK.

Step 39 of 39

21. Return to the home screen

Press the Home key to return to the home screen.

1. Find "Users & accounts"

Press Settings.
Press Users & accounts.

2. Create new email account

Press Add account.
Press Email.

3. Enter email address

Press Email address and key in your email address.

4. Enter password

Press Password and key in the password for your email account.
Press SIGN IN.
If this screen is displayed, you email account has been recognised and set up automatically. Follow the instructions on the screen to key in more information and finish setting up your phone.

5. Select server type

Press POP3.

6. Enter username

Press the field below "Username" and key in the username for your email account.

7. Enter incoming server

Press the field below "Server" and key in the name of your email provider's incoming server.

8. Enter incoming port

Press the field below "Port" and key in 110.
110

9. Turn off encryption of incoming email messages

Press Security type.
Press None to turn off the function.

10. Turn deletion of email messages on server on or off

Press Delete email from server.
Press Never to keep email messages on the server when you delete them on your phone.
Press When I delete from Inbox to delete email messages on the server when you delete them on your phone.
Press NEXT.

11. Enter outgoing server

Press the field below "SMTP server" and key in the name or IP address of your email provider's outgoing server. Please note that if you can't send email messages when using your email provider's outgoing server, key in smtp.vodafone.net.au (Vodafone's outgoing server).
smtp.vodafone.net.au

12. Enter outgoing port

Press the field below "Port" and key in 25.
25

13. Turn off encryption of outgoing email messages

Press Security type.
Press None to turn off the function.

14. Turn SMTP authentication on or off

Press the field next to "Require sign-in" to turn the function on or off. Please note that if you're using Vodafone's outgoing server, turn off SMTP authentication and leave the username and password fields empty.
Press the field below "Username" and key in the username for your email account.
Press the field below "Password" and key in the password for your email account.
Press NEXT.

15. Select setting for retrieval of new email messages

Press Sync frequency.
Press the required setting.

16. Turn email message notifications on or off

Press Notify me when email arrives. to turn the function on or off.

17. Turn on email message synchronisation

Press Sync email from this account. to turn on the function.
Press NEXT.

18. Find "Account settings"

Press the required email account.
Press Account settings.

19. Enter email account name

Press the required email account.
Press Account name and key in the required name.
Press OK.

20. Enter sender name

Press Your name and key in the required sender name.
Press OK.

21. Return to the home screen

Press the Home key to return to the home screen.

Get information on...

Or select...

Another device