


1. Find "Access Point Names"
Slide your finger downwards starting from the top right side of the screen.


1. Find "Access Point Names"
Press the settings icon.


1. Find "Access Point Names"
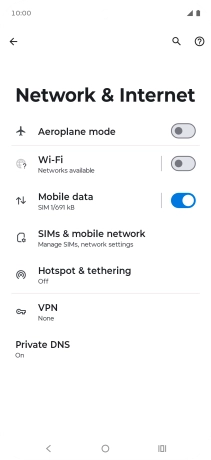
Press Network & Internet.


1. Find "Access Point Names"
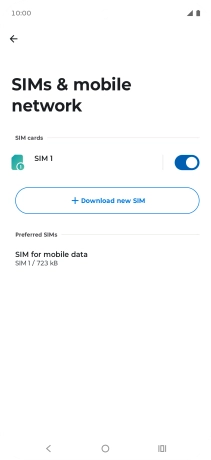
Press SIMs & mobile network.


1. Find "Access Point Names"
Press the name of the SIM.


1. Find "Access Point Names"
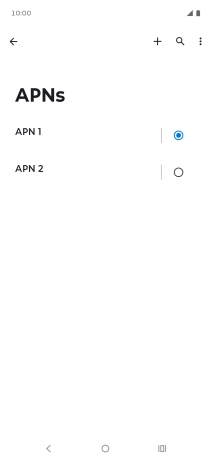
Press Access Point Names.


2. Create new data connection
Press the new data connection icon.


3. Enter a name for the connection
Press Name and key in Vodafone Internet.
4. Enter APN
Press APN and key in live.vodafone.com.
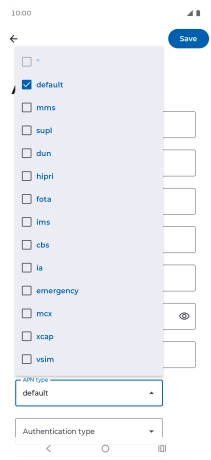
5. Select APN type
Press the drop down list below "APN type".


5. Select APN type
Press default to turn on the setting.


5. Select APN type
Press arrow up.


6. Select authentication type
Press the drop down list next to "Authentication type".


6. Select authentication type
Press PAP.
7. Save data connection
Press Save.


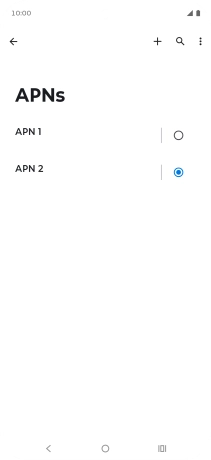
7. Save data connection
Press the field next to the data connection to activate it.


8. Return to the home screen
Press the Home key to return to the home screen.
1. Find "Access Point Names"


2. Create new data connection

3. Enter a name for the connection

4. Enter APN
5. Select APN type

6. Select authentication type


7. Save data connection
8. Return to the home screen
Thank you for your evaluation!
Thank you for your evaluation!